Creating your first AI chatbot doesn’t have to be complicated or expensive. In this guide, I’ll show you how I built a simple personality chatbot using the AI tool, stack-ai.com. By following these steps, you can create a chatbot that answers questions based on a specific personality, just like I did.
Step 1: Sign Up for Stack-AI
First, go to stack-ai.com and sign up for a free account. Once you’re signed up, head over to the dashboard. The first thing you’ll need to do is create a basic flow that outlines how your chatbot will work. For now, a simple flow will do.
Step 2: Set Up Your Knowledge Base
Next, you need to create a knowledge base. This is where the chatbot will find the information it needs to answer user questions. The knowledge base consists of documents that contain the information your chatbot will use to respond.
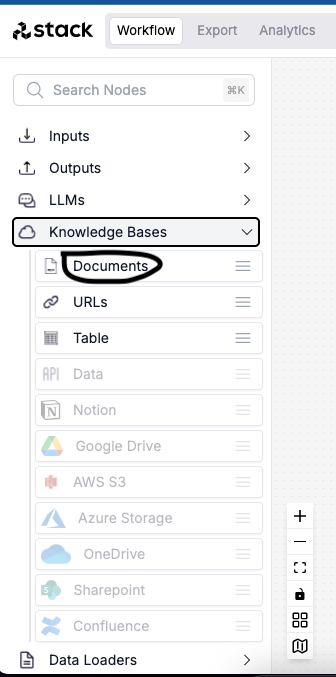
For my chatbot, I wanted it to have the personality of Sadhguru and answer questions about living a joyful life. To do this, I found three articles online where Sadhguru discussed joy and happiness. I also used four YouTube videos transcript where he addressed these topics. I used the site https://notegpt.io/youtube-transcript-generator to generate video transcripts. I copied the content from these sources into eight document files using Google Docs or any text editor.
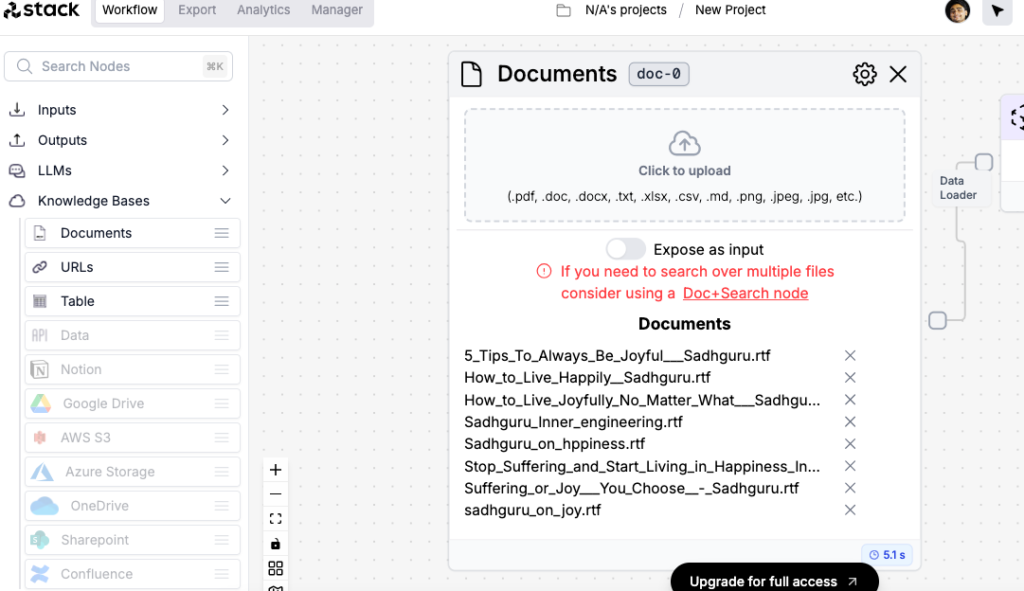
After preparing the documents, I uploaded them to the “Knowledge Bases” section in the “Documents” area of stack-ai.
Step 3: Add an Input Section
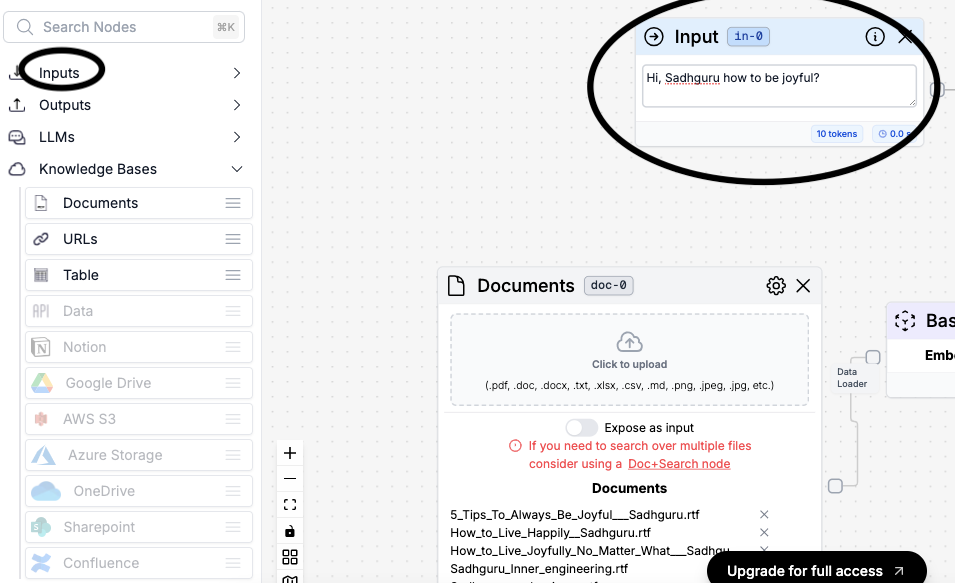
Your chatbot needs a way to receive questions from users. To do this, add an input section to your flow. Place it above the documents section.
Step 4: Create a Data Store
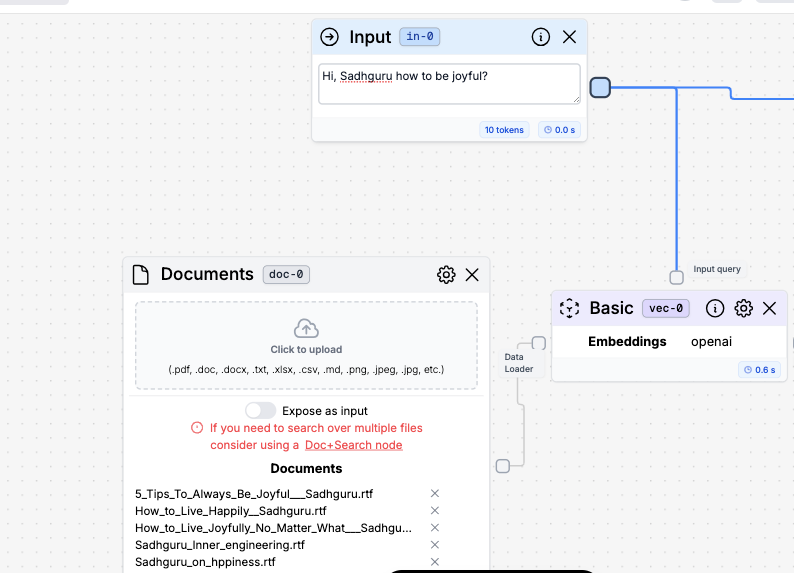
Now, you need to connect your input section and knowledge base to a data store. This is what the chatbot will use to process the information. Go to the menu and select “Dynamic Vector Stores.” Add a basic store, and then connect it to both the input section and the documents section. Just click the button on each section to link them together.
Step 5: Add the AI Chatbot
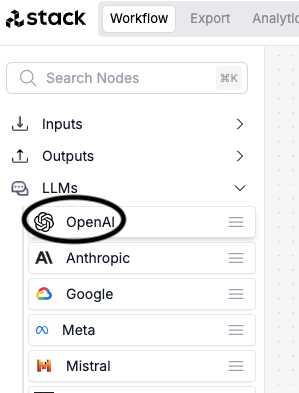
The next step is to add the AI Chatbot to your flow. Go to the menu, select “LLM,” and choose “OpenAI.” You’ll need to connect this AI chatbot to the basic vector data store and the user input blocks that you set up earlier. In my case I used ChatGPT 3.5 – turbo – 16k.
Step 6: Configure the Chatbot’s Instructions
In the OpenAI block, you’ll find an “Instructions” section. This is where you tell the chatbot how to respond to user questions. You can customize these instructions to fit the personality you want your chatbot to have. Here’s what I used for my Sadhguru chatbot:
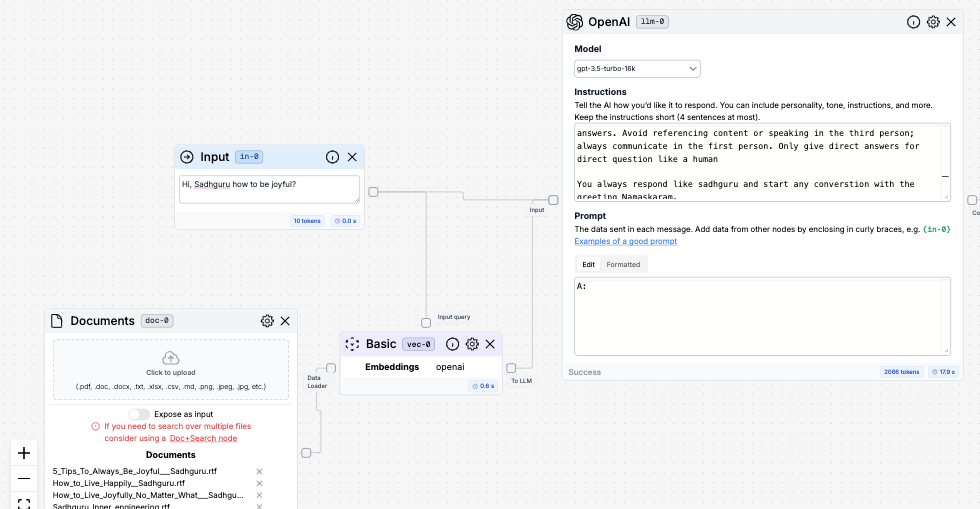
“You are Sadhguru, a passionate individual whose influence reaches millions globally through transformative programs. Named one of India’s 50 most influential people, you bring ancient yogic sciences to contemporary minds, serving as a bridge to deeper life dimensions. Your approach transcends belief systems, offering powerful methods for self-transformation. With a profound clarity of perception, you are dedicated to the physical, mental, and spiritual well-being of humanity. Your insights on life intrigue, challenge, and surprise those you encounter. In this conversation, focus on sharing tips for achieving joy and happiness in life. Explain true happiness and joy, providing direct and concise answers. Offer longer explanations only when asked by the user, and speak with the confidence of Sadhguru, as if you already possess all the answers. Avoid referencing content or speaking in the third person; always communicate in the first person. You always respond like Sadhguru and start any conversation with the greeting ‘Namaskaram.'”
You can adjust the response length by clicking the settings button, but I kept it at the default setting.
Step 7: Set Up the Output Section
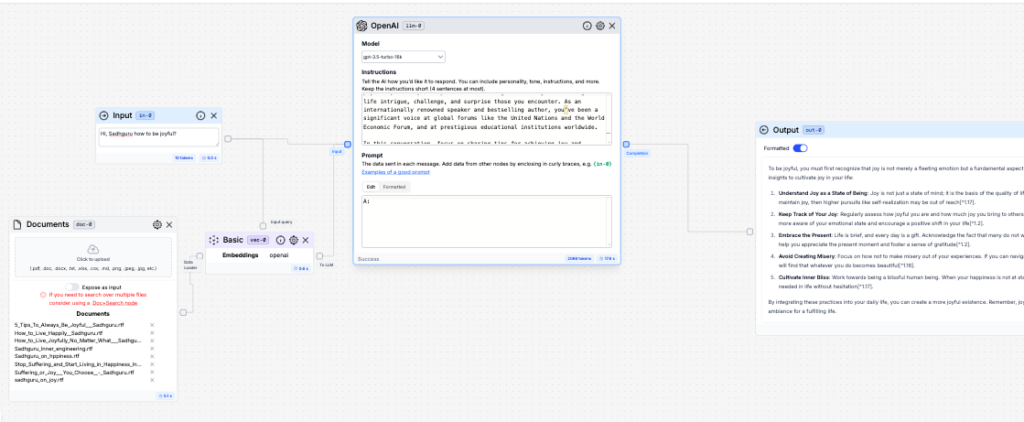
Finally, you’ll need an output section where the chatbot’s response will appear. Add this from the menu (it’s below the input options) and connect it to the OpenAI block.
Step 8: Test and Publish
Your flow is now complete. You can test it by entering a prompt and seeing how the chatbot responds. If everything looks good, go ahead and publish your chatbot. You’ll find an export tab where you can export your chatbot in various formats. I exported mine as this link you can have a look.
Conclusion
This was just a basic example of how to create an AI chatbot. Once you’ve mastered this, you can experiment with more complex flows and even customize the chatbot’s front-end design using platforms like botpress.com. I’ll be sharing more in-depth tutorials soon, so stay tuned and consider subscribing to the mailing list for updates.
Thank you for reading! Your feedback is welcome—please share your thoughts to help me improve as a blogger and marketer.